


Note : If you are a Mobile Phone User , Rotate Your Screen !!
Performance is enhanced when Kali Linux and Windows are dual-booted, although instantaneous switching between the two systems is not possible. It is preferable to use Kali Linux on a hypervisor such as VirtualBox.
Kali Linux may function as a standard Windows application thanks to a hypervisor. Kali and Windows can be switched between without restarting. Only a portion of your system's hardware is utilized by VirtualBox for Kali. Your primary operating system is unaffected by Kali's seamless operation.
Requirements:
- 20GB of free disk space on another operating system.
- You can download the Kali Linux ISO file from this link.
- The system has VirtualBox installed.
- Your hard drive should have at least 15–20 GB of free space.
- It is advised to have at least 8 GB of RAM.
Step 1: Create Virtual Machine -
- Open VirtualBox, then click the new button.
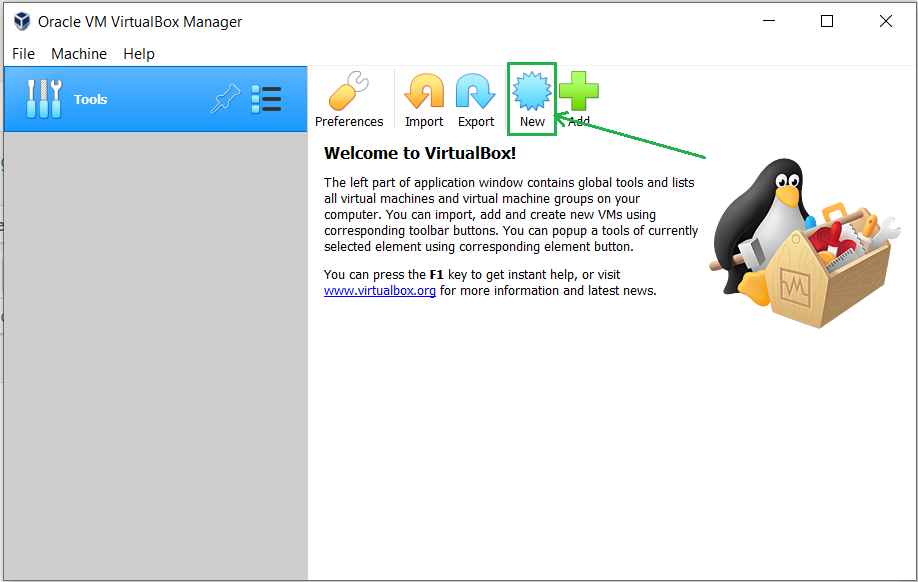
- Write the name of the virtual machine and choose the Debian-based 64-bit Linux architecture.

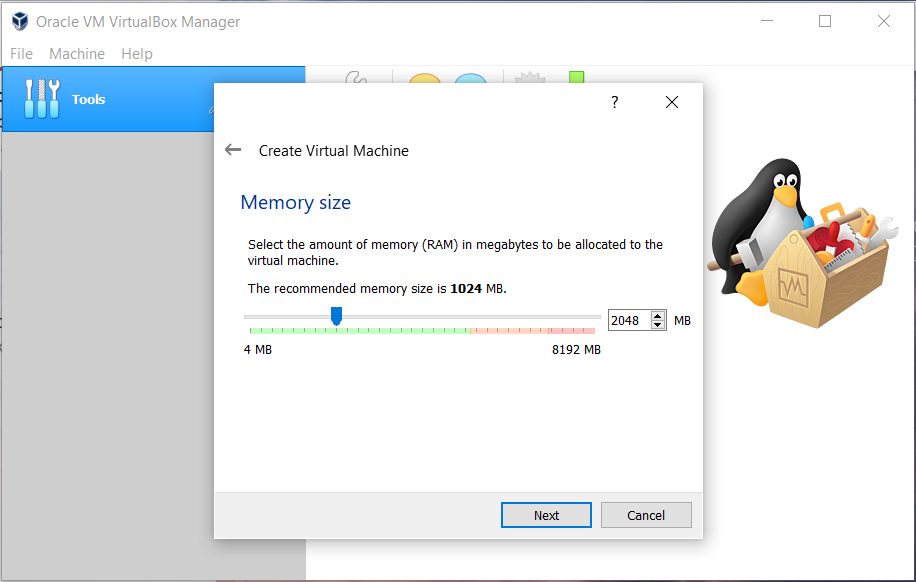
- Set the RAM memory size to the virtual machine of Kali Linux (2048 MB is recommended for normal usage).
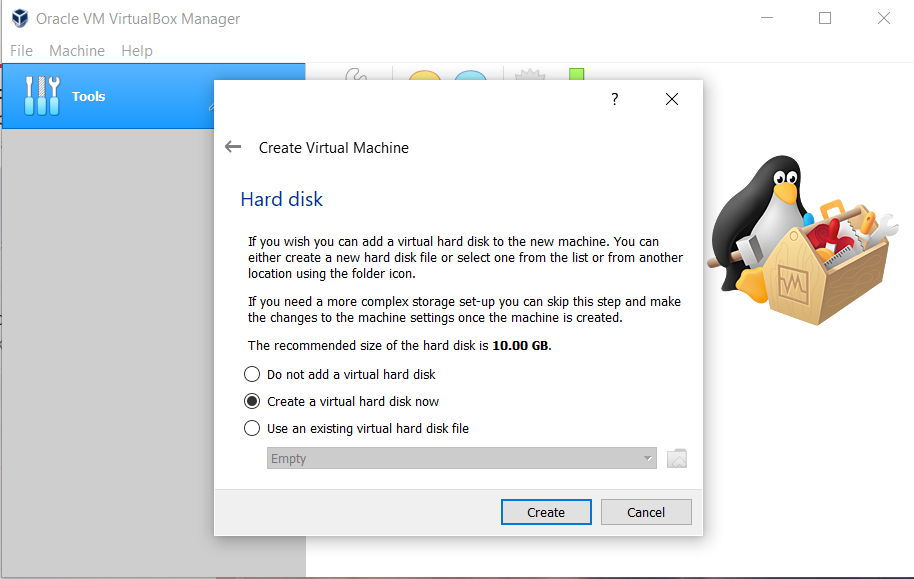
- Click the create button after selecting the option to create a virtual hard disk.
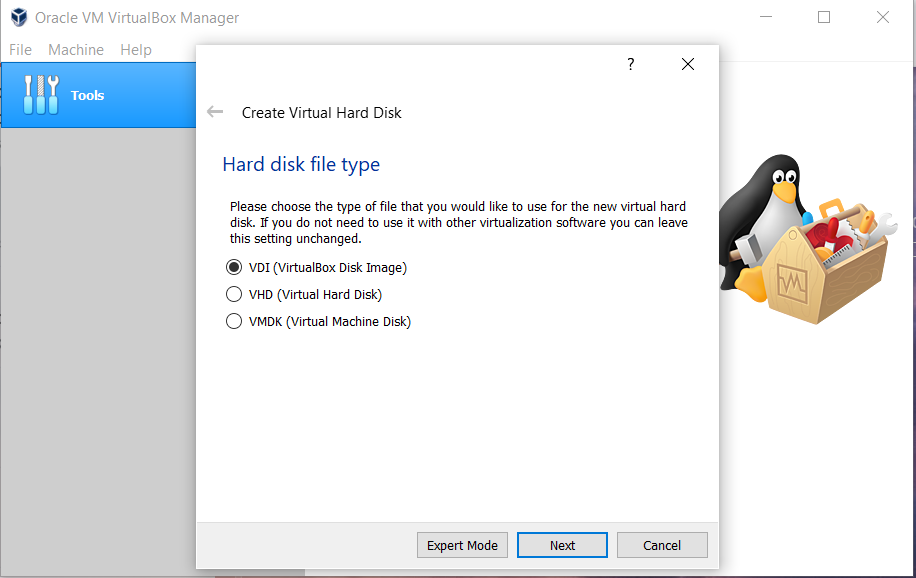
- Next, choose the Hard Disk File type for Virtual Hard Disk (VDI is recommended for daily purposes).
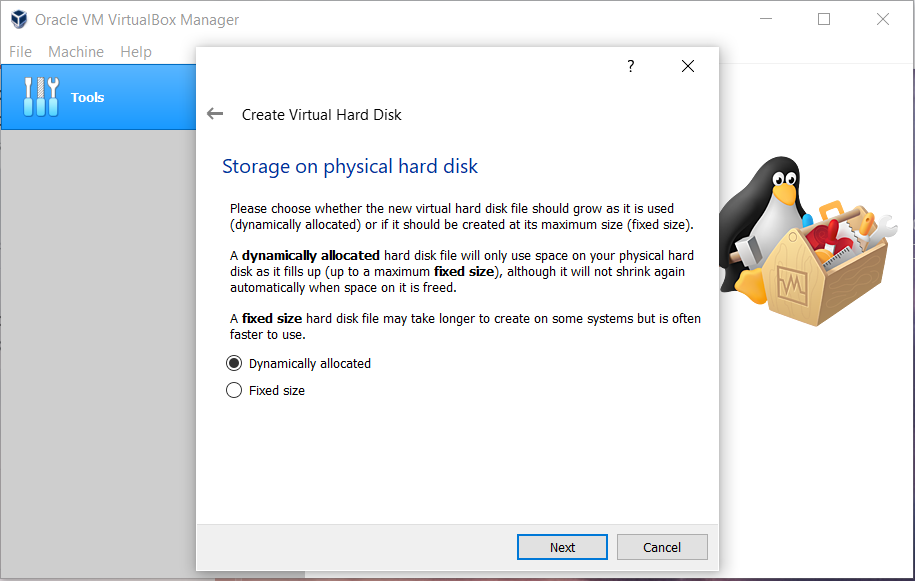
- Next, choose the type of Physical Hard Disk Storage (Dynamically Allocated is recommended for general purposes).
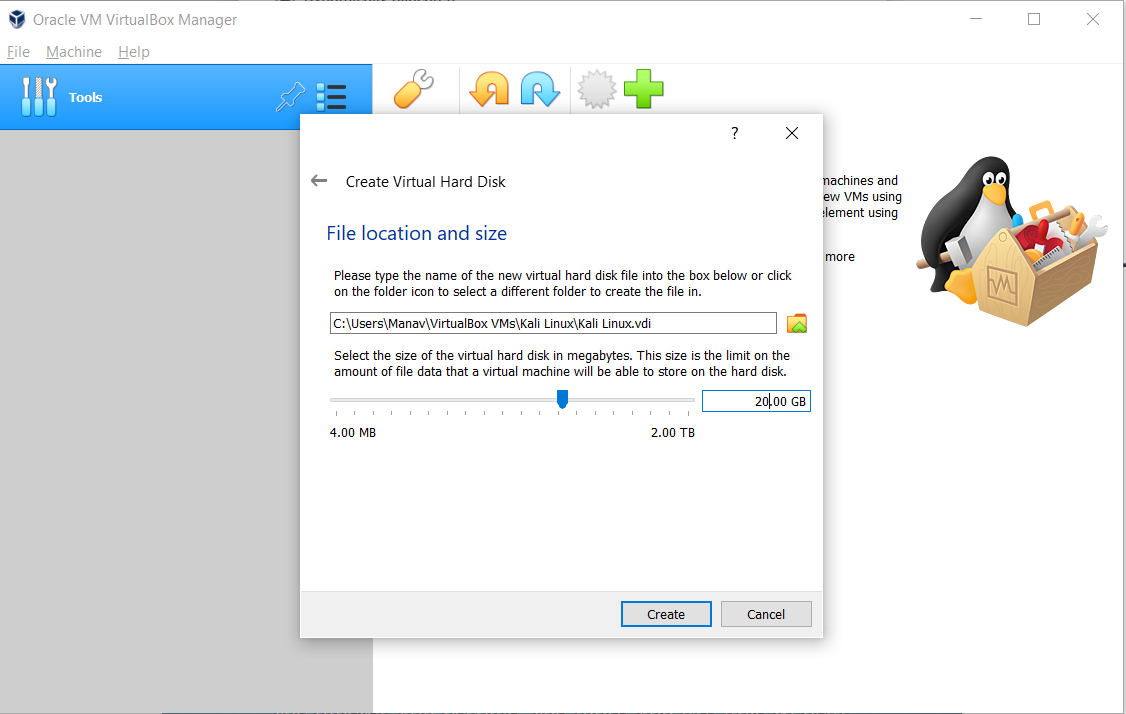
- Finally, choose the size of your virtual hard disk and its files.
Step 2: Start VM and Load ISO -
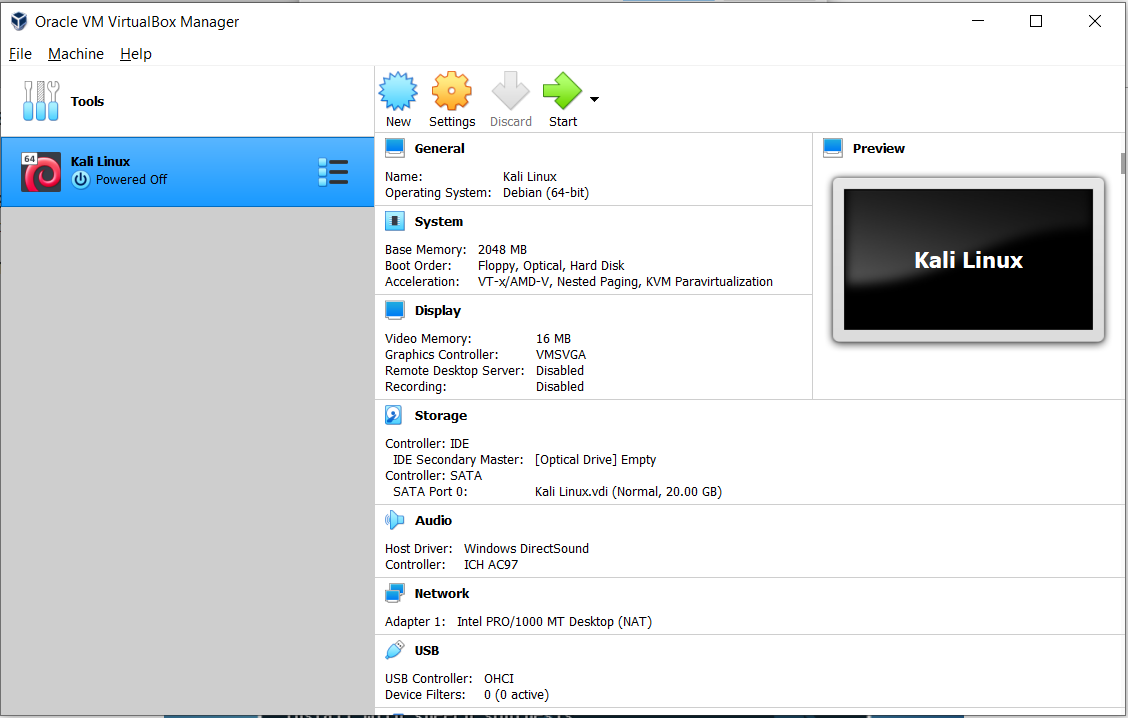
- After the processing is finished, click the virtual machine name on the left panel and click the start button from the top.
- Next, click the Browse icon, which is right above the cancel button, and choose your downloaded Kali Linux ISO file.

- Finally, click the start button. This will start our virtual machine from the selected Kali Linux ISO file. Click the Graphical Install button and press Enter.

Step 3: Configuration of the Basic System -
- The next option is to choose a language. Click Enter after choosing your preferred language.

- Choosing a nation, territory, or region is the next step. Thus, choose the appropriate one.

- Configuring your keymap is the next step. Click Next after confirming the keymap you wish to use. * When prompted for a hostname in the following step, enter it and click "Continue."

- The next step is to enter your preferred domain name; if you don't have one, you can leave it blank.

- The next step is to input your preferred domain name; if you don't have one, you can leave it blank.

- Click "Continue" after entering a secure password for your Kali Linux operating system.

- The next step is to decide the time zone you want the Kali Linux machine to use by default.
Step 4: Partitioning the disk -
- To confirm, select the "Manual" option and click "Continue."

- Click "Continue" after choosing "Free Space" and creating a new partition. Additionally, it is advised that new users avoid using distinct partitions for their home, swap, and root sectors.

- Click "create a new partition" now.

- Enter the size of the partition that has to be formed now.

- Choose "Logical" as the partition type now.
- If you're new to Linux, use the partition settings listed below, or modify them to suit your needs. Click "Done setting up the partition" after that.* To write modifications to the drive, simply click "finish partitioning."

- Now just click on finish partitioning and write changes to disk.

- To proceed, choose "no" at this point.

- Now choose "yes" and click "continue" to write modifications to the disk.

Step 5: The Installation Procedure -
- At this point, give your virtual machine a few minutes to install the Kali system.

Step 6: Configuring the Bootloader -
- The next step is to decide whether or not to install the GRUB boot loader to the master boot record. To add the same, click "yes."

- From the list of devices, select the hard drive that you want to boot into.

Step 7: Complete Configuration and Boot -
- This will initiate the installation of the Kali Linux operating system, which will take several minutes to finish. Once the installation is done, a reboot will occur.
- The virtual machine will immediately restart and boot the Kali Linux operating system once the entire operation has been successfully completed.
- Simply shut down the Kali Linux operating system to end the virtual computer; this will do so automatically.